


Greetings All,
I just ordered several Wall bags along with my students from Everything Wing Chun, and I figured it’s a good time to talk about Wing Chun Wall Bag training. I will cover the basic concepts behind the training, along with how to choose a wall bag, fill it and hang a wall bag. So let’s get started!
Wallbags are very different from hanging bags (like those used in Boxing). The Wing Chun wall bag is placed up against the wall where there will be very little give. It will help the Wing Chun practitioner to work on three important concepts. The concepts of re-coil forces, penetration and structures. It is important that before you begin using a Wall Bag that you’ve spent sometime working on the proper structures for punching. If you don’t have good structures for punching you will most likely injure yourself when training on the Wall bag.
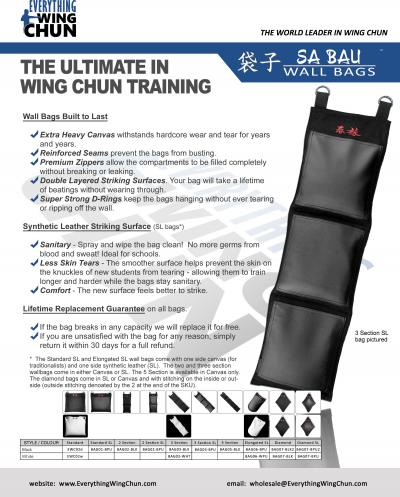
What Should I look for in a Wallbag?
Wallbags are typically made of canvas, leather or synthetic materials. When purchasing a Wall Bag remember the type of abuse it is going to take. Here are somethings to look for in a Wall Bag:
1) Heavy Duty Zipper: You want to make sure that they are using a heavy-duty zipper. I had a wall bag that used a standard zipper (like those on a pair of jeans) and after a few months of use I split the zipper. So take my advice, look for a wall bag with a heavy-duty zipper.
2) Double Layer Striking Surface: Try and find a wall bag that the striking surface is double layered (two layers of canvas or a layer of canvas and leather). Over time the bag will stretch from striking and by the continual weight of the wall bag fill material. As the fabric stretches it becomes weaker making tears easier to happen. But with a multi-layer striking surface you can increase the overall life of the bag.
3) Double Stitched and Reinforced Seams: Make sure the Wing Chun wall bag uses double stitching and re-inforced seams. If you don’t have the seams double stitched (as a minimum) you will eventually burst the bag or cause your wall bag to leak the fill media that you are using. If you can find a bag with additional reinforcement at the seams (additional fabric across the seams) it’s always a nice bonus!
4) Heavy Duty D-Rings or Grommets: Remember you are going to be hanging this wall bag and if you use a heavy media (like sand) it’s going to weigh a lot. Make sure that the D-Rings or Grommets don’t look flimsy or undersized. Also make sure that wall bag is stitched near the Grommets so that they are isolated from the fill media.
What Style of Wallbag Should I Use?
The style is really up to you. It’s a personal thing. But here’s some suggestions on a few bags:
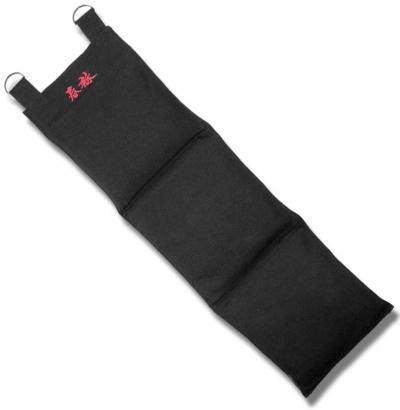
1) Simple Single Pocket: If all you want is a simple bag, go with the standard single pocket type.
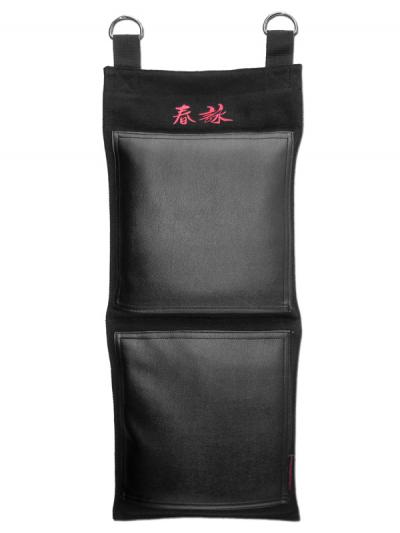
2) Three Pocket Wallbag: If you want to be able to continually punch strike at different levels, a three pocket wall bag is great for simulating striking from the waist up.
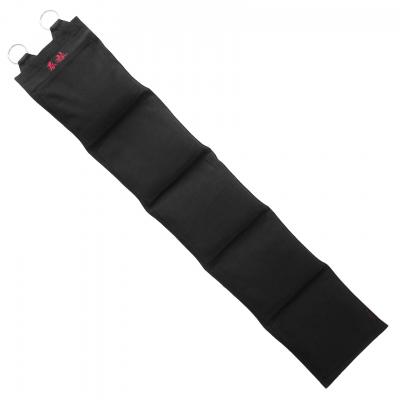
3) Five or More Pocket Wallbag: A nice option if you want to consider knees, and possibly kicking. A word about kicking (don’t let your foot or knee drag down the bag as you make pull the bag off the wall (or possibly damage the bag mounting hardware or zippers).
4) Diamond Shape Bags: Great for those that want to work on striking a smaller surface for better accuracy.
What Fill Media Should I Use in my Wing Chun Wall bag?
Let me start with this first: DON’T USE BALL BEARINGS, ROCKS, or OTHER STUPID THINGS. I don’t care if you heard or read that masters hundreds of years ago used ball bearings or rocks in wall bags to train their hands. First of, ball bearings weren’t developed until the industrial age. Secondly, you WILL permanently damage your hands. You will regret your training when you are older (or sooner, if you cripple yourself). Understand that the hands are made up of hundreds of tiny bones held together with cartilage and tendons. Bashing them on rocks and the like will fracture or deform your hands. So please think and USE YOUR HEAD!
I look at Wall bag training as a method of learning the concepts of re-coil forces, proper structures (both striking tools and stances), and penetration (sinking) power. Hand conditioning is a by-product of the training, not the primary goal. So you can see how hitting Rocks or Ball bearings is actually counter-productive.
What you can fill your Wing Chun Wall Bags with:
- Rice
- Dry Mung Beans
- Poly Urethane Beads
- Dry Soy Bean
- Dry Yellow Bean
- Sand (Dry coarse, don’t use orange builder’s sand as it will stain)
Keep in mind the environment that your wall bag will be in. If it is damp or humid I would recommend using a Poly Urethane bead. While the plastic beads are expensive, will won’t be easily compromised by mold as the other organic fill media will be. The type of Poly Urethane beads that I used I got from a craft store, tell them you want urethane beads to fill a doll. That stuff has a nice dense feel to it, but still has some give too. If you do use sand, make sure it’s a coarse type as the fine sand will make dust as you strike it (and the thought of that entering my lungs isn’t nice). If you are a beginner, I would strongly recommend the mung bean or rice as a fill, it will give nicely and give you time to master punching properly.
When you fill your wall bag, I find leaving about 1 or 2 inches from the zipper usually give the bag enough space for the fill media to move when I strike the bag. I would recommend starting with a 2 inch gap, then place the wall bag on the wall and try hitting it (with 50% power) If you find that you reached the wall, then add a little more fill until you don’t reach the wall. If you don’t leave any gap, you will stress the zipper and the seams of the bag when you hit it. This will shorten the life of your Wing Chun Wall bag.
How Do I Mount My Wing Chun Wall Bag?
(While I have used these methods, I don’t take any responsibility for any damage that you do!)
CONCRETE WALL: If you are lucky enough to have a concrete wall available, go to a hardware store pick up some wall mount hooks, and some concrete ‘Tap-Con’ type screws. While in Yee Jee Kim Yeung Ma, set the height of the bag so it is level with your head. If it is a multi-pocket bag, set the first pocket level with your head. Install wall mount type hooks and concrete screws per manufacturer’s instructions.
FINISHED DRYWALL: If you are putting this in a room where the walls are made with framing and drywall, you will need to reenforce the wall, if not you will damage the drywall (and someone will not be happy). You will need a stud finder, a sheet of 1 inch plywood (or thicker), wall mount hooks, and wood screws. First off, I would find three wall studs using the stud finder (you will place the center of the bag in-line with the middle wall stud and screw into the stud to the left and right of the center stud) (Studs are typically between 12 or 16 inches apart). Measure the distance between the studs (between 24 inches and 32 inches) and add 4 inches. This is width of the plywood board. The length of the plywood board will depend on the style of bag you have. I would take the bag and lay it out on the plywood board taking into account that you will be anchoring it directly to the plywood. With that all done, Get in Yee Kee Kim Yeung Ma and set the height of the wall bag in line with your head. (I recommend getting a buddy to help you here). Set the plywood at the correct height, remembering to center the plywood sheet in-line with the middle wall stud. Fasten the plywood sheet to the wall, remembering to fasten into the wall studs (not just the dry wall). Install your wallbag so that it is centered with the middle wall stud, and there you go.
How Do I Use My Wing Chun Wall Bag?
Now that you have your wall bag up, it’s time to use it. But before you go full out and start hitting it. A word of caution. If you’ve never struck a object before, or are uncertain if your mechanics are correct. STOP. Talk to your instructor, have them look at your technique and ask them if you should start striking a wall bag. With that been said, let’s move on.
When you strike your wall bag, remember to start of light at first. Don’t worry about penetration or speed. Just get used to making contact with the surface. Make any corrections to your form, and get surface of your skin used to canvas surface. As you become more comfortable and proficient, apply a little more force, your aim should be to sink through the bag and touch the wall (but if your bag is properly filled, you will never truly reach it). You will start to feel some of the re-coil forces from your punch. If you find them jarring, reduce your power. Remember to stop if you feel you are losing your form, feel any pain, or start bleeding because you have torn the skin from your hands.
As for how often to train, I would only do it once or twice a week, being mindful of any bruising, cuts (or other injuries, minor or otherwise) and adjust my training to allow myself to heal properly.
Remember when training the Wall bag, to use your brain. If it hurts or you’re injured stop. Bashing your hands into a bloody pulp is both stupid and foolhardy, you will regret it was you age. If you are patient and start your training gradually you will find that you will progress more steadily. And Always consult your instructor for guidance.
Chuck O'Neill is a Wing Chun Sifu teaching in Toronto and Kitchener CANADA. He also has a series of Wing Chun Videos available on DVD from Everything Wing Chun and in downloadable format at www.learn-wing-chun-online.com.